Before going to culinary school, I had very little experience baking and decorating cakes. I was far from calling myself anything but a true novice. Even at school, we only focused about one week for the entire year on cakes. Although I tried to absorb as much as I could, it still is a very delicate, and challenging process. I still have many things to learn, but however, I believe some of these tips could help anyone out who’s interested in baking a layered cake for an event like a birthday or a party.
Research:
Although this can be a tiresome process, make sure to do your homework! Look up Youtube videos on how to decorate a cake. Look up different recipes that can fit your specific needs. Don’t be afraid of the endless amount of chocolate and white cake recipes that are out there in the world. Sadly it can be a trial and error process, but once you finally find that one consistent recipe for a cake batter, frosting, and fondant (for the more advanced), you’ll be rejoicing in that wonderful end product! I will list some of my personal favorites at the end of this blog!
Basic Utensils:
It’s always smart to be prepared ahead of time. I can’t remember how many times when I was a kid to ask my mom to drive me to the store because I forgot the baking soda. Make sure you have all of the ingredients you need, and the utensils to do so. Here is a list of the basic utensils you need to be successful:
-Round cake pans – The industrial half sheet trays are nice too for square, layered cakes
-Cooling rack – This helps properly cool the cake
-Hand or stand mixer – A ‘good’ hand mixer costs around $40. If you can afford the lovely KitchenAid Stand mixers though (those run about $350) I always suggest those. You won’t regret it.
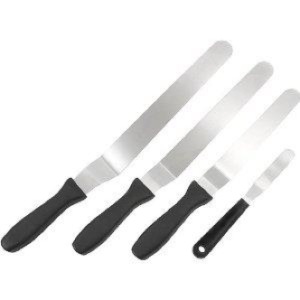
-Off-set Spatula’s – Although not necessary, it is definitely beneficial to have to give your cake that professional frosted look.
-Piping bag/Piping tips – Again not necessary. A neat trick to avoid spending the extra cash is to put your frosting of choice in a ziplock bag. Close it, and then cut one of the bottom corners however thick you want. It’s a perfect tool for writing on your cake, however not the greatest for design.
Take your time!!
This is probably the most important advice out of all. Especially decorating a cake for your first time, the slower, the better. It is a learning experience, and even to this day, I take as much time as I need. If you’re layering a cake, the easiest way to frost the middle is to freeze the cakes overnight. The next day pull them out, and frost. This way, the cake is much easier to handle, and a lot more forgiving when you’re moving it around. If you’re feeling overwhelmed, take a break for a few hours and then come back to it. I like to give myself between three to four days as a whole. Bake the cake, let it cool and then freeze it. Next day make the frosting and build the cake. Either that day or the day after, then decorate it.
Imperfect Perfection
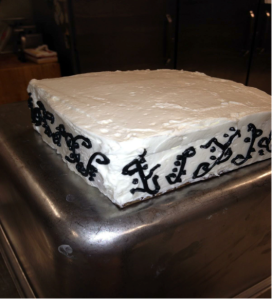
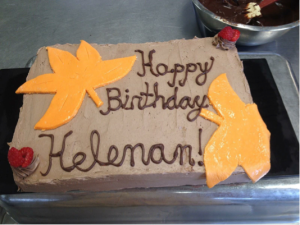
Your first cake will not be perfect, but it will be perfected overtime. I have no shame in the cakes I have baked that came out sloppy, because I learned from them. It isn’t a talent someone can pick up overnight. Although I am creative, I am not very artistic, and that is something I try to get better at with each cake I make. The best way to work towards a good cake is practice! It may sound expensive at first, but if you buy all of the ingredients you need, you can bake at least two or three cakes out of those initial ingredients you buy. Some of the best ways of using up those practice cakes is by taking them to your coworkers, family, or friends. They’ll love you for it!
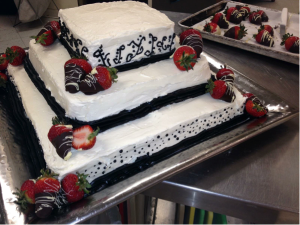
Although I still have a lot to learn, I am very lucky I have learned many of these things through working at Webster’s. Our Pastry Chef, Sherrie, is extremely knowledgeable and makes very beautiful cakes for any event! So if you’re wanting to go that extra mile for a special occasion, give us a call and we can help.
269.226.3144
In the meantime, happy baking!
-Amy Spalsbury
-Webster’s Prime
White Cake Recipe
6oz. Butter
½ C. Sugar
2 C. All-Purpose Flour
2 tsp. Baking Powder
¼ tsp. Salt
6 egg whites
¾ C. Milk
2 tsp. Vanilla
Butter 2 round cake pans, the bottom lined with parchment. Preheat oven 350 degrees. Beat butter and sugar until light. Combine egg whites, milk, and vanilla. combine dry ingredients. Alternate flour and milk mixture. Do not over mix. Bake for 10-15 minutes. Check with toothpick or until golden brown.
Buttercream (Great for frosting cakes!)
2 C. unsalted butter, slightly colder than room temperature
4 C. confectioners (powdered) sugar, add more if needed
2 tsp. clear vanilla extract* (If it’s dark, your cream will be a little off white)
¼ C. condensed milk
Whip butter until fluffy. Slowly add confectioners sugar. Finally add vanilla and condensed milk. Add more confectioners sugar if the frosting is too loose. If you want to turn this into a chocolate frosting, add cocoa powder and melted chocolate (make sure the chocolate is not extremely hot or else the butter will break).
Marshmallow Fondant (Great tasty substitute for regular fondant for molding!)
4 Cups Marshmallow
2 Tbl. Water
4 C. Confectioner’s Sugar
Food coloring optional
Put the marshmallow’s and water in a microwavable bowl, and heat until the marshmallow’s are soft. Add sugar and stir with rubber spatula until it can’t be stirred anymore. Dust a table top with sugar, and pour the marshmallow mixture onto the table. Knead until the fondant loses its stickiness.


